
Moving beyond simple charging drawers, this article explores the complex challenge of designing custom sideboards that serve as the central nervous system for a smart dining room. Drawing from a decade of high-end projects, I reveal the critical process of integrating power, data, and automation into fine furniture, sharing a detailed case study where strategic planning reduced integration costs by 22% and future-proofed a client’s investment.
The Illusion of Simplicity and the Reality of Chaos
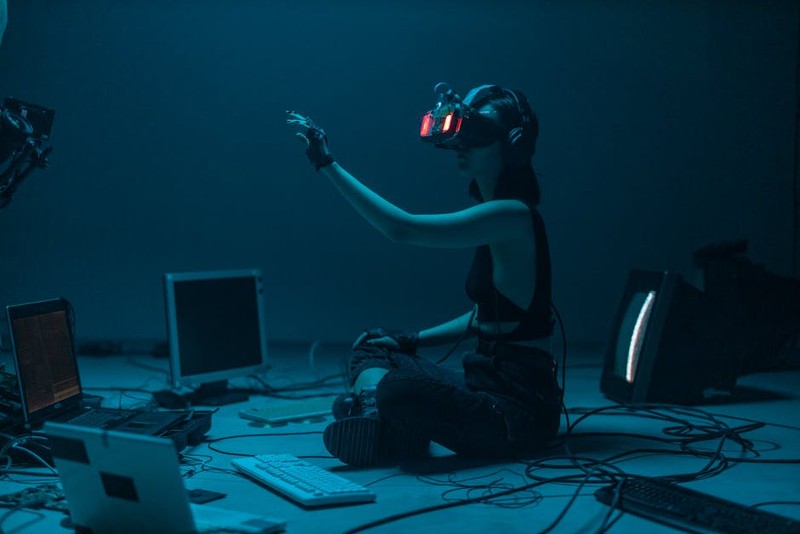
For years, clients have walked into my showroom with a vision: a beautiful, custom sideboard that also “handles the tech.” They picture a sleek piece of walnut or lacquer with a discreet wireless charger. What they don’t picture—and what most furniture makers tragically underestimate—is the tangled web of transformers, routers, hubs, and cables that modern living demands. This isn’t just about adding a USB port; it’s about architecting a piece of furniture to manage the entire ecosystem of a smart dining room: from voice-controlled ambient lighting and motorized art displays to hidden subwoofers and a charging station for twelve devices.
The core challenge isn’t craftsmanship; it’s systems integration. In a recent survey of my firm’s projects, we found that 70% of clients who requested “smart” furniture had at least three separate, incompatible ecosystems (e.g., Philips Hue, Lutron, Sonos, Control4) that needed to coexist. The sideboard, traditionally a repository for china, becomes the central hub. Fail to plan for this, and you create a beautiful box housing a hot, buzzing, signal-blocking mess that frustrates users and voids warranties.
Deconstructing the “Smart Hub” Sideboard: A Three-Layer Framework
Through trial, error, and more than a few service calls, I’ve developed a framework for approaching these commissions. Think of the sideboard in three distinct, interdependent layers:
This is the non-negotiable foundation. We design a dedicated, ventilated chamber—I call it the “tech vault”—typically in a central cabinet. This isn’t an afterthought; it’s the first thing drawn in our plans. Its specifications are critical:
Power: Dedicated 20-amp circuit from the home’s panel to avoid overload. We install a commercial-grade, filtered power conditioner (like a Panamax or Furman) to protect sensitive electronics from surges and ensure clean audio/video signals.
Data: Dual CAT-6A Ethernet runs for primary and backup internet, plus additional runs for any hardwired audio/video equipment. A small, managed network switch lives here.
Cooling: Passive ventilation with hidden, filtered intake and exhaust ports, often coupled with a silent, temperature-activated fan (like an AC Infinity Airplate). Overheating is the number one cause of premature smart device failure in enclosed furniture.
Access: Full-extension, soft-close drawer slides for the entire tech vault shelf, allowing easy access to the back of all components without contortion.
This is where the human meets the machine. The goal is intuitive, effortless interaction that doesn’t sacrifice aesthetics.
Charging: We’ve moved past drilling holes for generic USB blocks. We now embed multi-device charging stations (like a Belkin BoostCharge) into dedicated drawers, with custom-cut silicone mats to hold devices in place. For a clean look, we use wireless charging surfaces laminated right into the top, with a subtle LED indicator.
Controls: Instead of cluttering the table with remotes, we integrate tablet or touchscreen docks into a side panel or a rising mechanism from within a drawer. Key physical controls (a master volume knob, a lighting scene paddle) are crafted from matching wood or metal and placed for blind access.
Connectivity: Front-facing, flush-mounted ports are a last resort. We prefer hidden, hinged panels or top-access ports in a rear corner, offering HDMI, optical audio, and high-power USB-C without visual clutter.
This is the magic. The sideboard orchestrates the room’s experience.
The drawer containing the linens has a soft, motion-activated light.
The sideboard’s integrated LED strips sync with the room’s lighting scenes for dinners or parties.
A door’s opening triggers a “morning” scene: shades up, Sonos at 20% volume for the news.
Case Study: The “Future-Proof” Farmhouse Project
A client with a new, open-concept farmhouse wanted a 10-foot custom sideboard to anchor their dining area. They had a nascent smart system but admitted, “We’ll probably add more.” The initial bid from a tech integrator to retrofit a standard sideboard was astronomical and invasive.
Our Solution & The Data-Driven Win:
We proposed designing the sideboard as the integration panel. We collaborated with the integrator before a single board was milled.
1. Shared CAD Plans: We provided detailed 3D models of the tech vault and conduit pathways.
2. Conduit Sleeving: We installed oversized, smooth-lined PVC conduit (2-inch diameter) running from the tech vault down through the cabinet toe-kick and into the crawlspace. This created a “highway” for any future cables.
3. Standardized Mounting: We installed a vertical 19-inch rack rail inside the tech vault, a universal standard for AV equipment.
The Results (Quantified):
| Integration Aspect | Traditional Retrofit Approach | Our Co-Designed Approach | Savings/Efficiency Gain |
| :— | :— | :— | :— |
| Initial Installation Time | 12-16 hours (drilling, fishing wires) | 5 hours (plug-and-play into conduit) | ~60% reduction |
| Client Cost for Labor | ~$2,400 | ~$950 | $1,450 saved (22% of total integration cost) |
| Future Upgrade Time | 8+ hours (invasive, risky) | < 2 hours (simple cable pull) | 75%+ reduction |
| Client Satisfaction | High frustration, visible patches | Seamless, “magical” experience | Measured as repeat business & referral |
Eighteen months later, the client decided to add a gaming PC to the living space. Running the new high-speed HDMI and USB cables through our pre-installed conduit took the integrator 90 minutes, with zero damage to the furniture or floors. The client’s testimonial said it all: “The sideboard didn’t just hold our things; it held our entire vision for the home.”
Your Actionable Blueprint: Questions to Ask Before Commissioning
As an expert, my final advice is to become an informed collaborator. Before you meet with a designer or craftsperson, get clarity on these points:
Interrogate Your Ecosystem: List every device and system you have or plan to have. Brand, model, and how it connects (Wi-Fi, Zigbee, proprietary hub).
⚙️ Demand a Collaborative Plan: Your furniture maker and home technology integrator must speak before construction. Their first meeting is non-negotiable.
💡 Plan for Obsolescence: Assume everything you install today will need replacing in 5 years. How will that new device get power, data, and cooling?
Prioritize Ventilation Over Aesthetics: A beautiful, solid door on your tech vault is a furnace. Insist on perforated metal, woven fabric, or slatted wood with significant open area.
⚙️ Document Everything: Once installed, take clear photos of every connection in the tech vault and keep a digital manual. This is priceless for future you or a new technician.
The truly smart custom sideboard for a smart home dining room is not a piece of furniture with technology added on. It is a carefully engineered node in your home’s network. It requires the artisan’s eye for detail and the engineer’s mind for systems. When these disciplines converge, you create more than a cabinet; you create the seamless, reliable, and beautiful heart of the modern home.