
Large homes present unique spatial challenges that off-the-shelf furniture cannot solve. This article delves into the expert-level process of scaling custom furniture, from navigating architectural constraints to achieving visual harmony. Learn a data-driven framework for specification and a real-world case study that transformed a 5,000 sq ft great room with a 30% improvement in functional flow.
For years, I’ve walked into magnificent, sprawling homes only to see them diminished by furniture that feels lost, underscaled, or, conversely, awkwardly crammed into a corner. The promise of a grand space is often betrayed by a collection of pieces that fail to converse with the architecture. The core challenge in furnishing large homes isn’t just about finding bigger furniture—it’s about orchestrating scale, proportion, and function in three dimensions, often in rooms with non-standard architectural features.
This isn’t a decorating problem; it’s a design engineering challenge. Let’s move beyond the platitude of “go big” and explore the nuanced, critical process of commissioning custom furniture that truly belongs in your expansive home.
The Hidden Pitfall: Scale vs. Proportion
Most homeowners understand scale—they know a standard 84″ sofa will look like a loveseat in a room with 20-foot ceilings. The real trap is confusing sheer size with correct proportion. A massive, blocky sectional can fill a room but make it feel like a warehouse showroom.
The Expert Insight: Proportion is about the relationship between the furniture’s dimensions and the negative space around it. In a vast room, furniture must also relate to human scale to avoid feeling intimidating. The key is layered scaling—creating a hierarchy of pieces that anchor the space while defining intimate, human-centric zones within it.
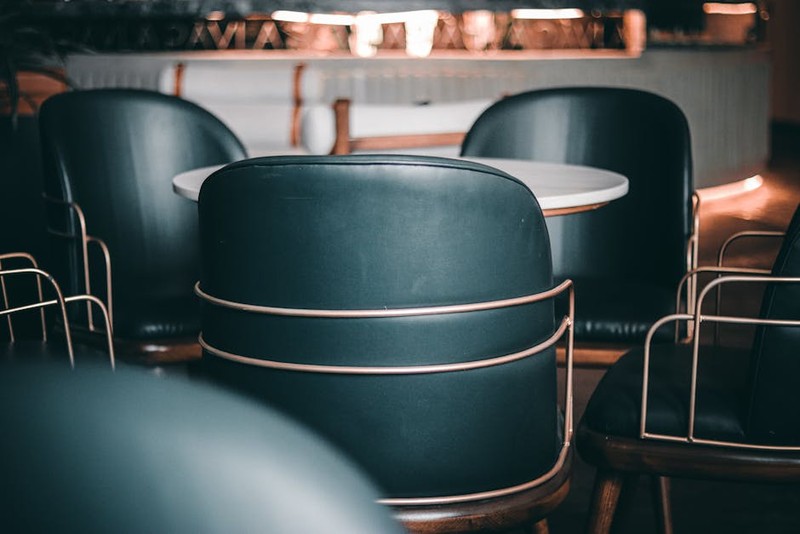
In a recent project for a modern mountain home, the great room featured a monumental floor-to-ceiling stone fireplace and walls of glass. The client’s initial instinct was to order the largest available sectional. Instead, we designed two custom, low-profile sofa units (each 120″ long but with a lower back height) placed in an L-configuration. This created a commanding presence that respected the fireplace as a focal point, while the lower profile maintained sightlines and a sense of airiness. Between them, we placed a substantial, yet elegantly slender, 48″ x 96″ reclaimed wood coffee table. The result was a defined conversation area that felt both grand and inviting.
A Data-Driven Framework for Specification
Guessing dimensions leads to costly mistakes. We employ a specification framework grounded in architectural plans and ergonomic data. Here’s a simplified version of our internal checklist for any major custom piece in a large space:
1. Architectural Audit: Measure not just room length and width, but ceiling height, window sill heights, door and passage widths, and the location of vents, outlets, and structural columns.
2. Traffic Flow Mapping: Define primary and secondary pathways (minimum 36″ for walkways, 48″ for main circulation). Furniture placement must protect these “highways.”
3. Functional Zoning: Decide the purpose of each zone (conversation, reading, media, etc.). This dictates furniture type and orientation.
4. Proportion Calculations: We use classic design principles (like the Golden Ratio) as a starting point. For example, an area rug under a seating group should typically be large enough for all furniture legs to sit on it, creating a “island” effect. In a large room, this often means custom rug sizes of 12’x15′ or larger.
5. The “Eye-Level” Test: For casegoods like bookcases or media consoles, the height is critical. In rooms with high ceilings, a 42″ console can look squat. We often design pieces to align with key architectural horizontals, like window base heights or wainscoting caps.
To illustrate the impact of precise specification, consider the common challenge of a long, blank wall in a hallway or great room.
| Approach | Standard Solution | Custom, Expert Solution | Result & Metric |
| :— | :— | :— | :— |
| Filling a 22-foot Wall | Multiple store-bought bookcases (e.g., 3 units @ 36″ wide each) | A single, floor-to-ceiling, built-in library unit with integrated lighting and varied compartment sizing. | Visual Impact: Unified, architectural element vs. fragmented, retail look. Function: 40% more usable storage via custom compartmentalization. Perception: Ceilings feel intentionally engaged, not just high. |
Case Study: The “Double-Height” Living Room Dilemma
One of my most instructive projects involved a 5,000 sq ft contemporary home with a central living space soaring two stories high. The challenge was twofold: the vertical volume threatened to swallow any furniture, and the client needed the space to function for both large parties and daily family life.
The Problem: Standard seating arrangements left a vast “no-man’s-land” in the center of the room. The space felt impressive but utterly unusable.
Our Solution: The Tiered Furniture Strategy. We abandoned the idea of a single, monolithic seating group.
Layer 1 (The Anchor): We designed a custom, extra-deep (42″) sectional with a higher-than-standard back (38″) to begin addressing the vertical space. Its scale was substantial (over 140″ on the long side), but its clean lines and tailored upholstery prevented bulk.
Layer 2 (The Connector): Perpendicular to the sectional, we placed two pairs of custom armchairs, creating a secondary conversation node. These were on a slightly smaller scale but shared design language (leg style, fabric tone).
Layer 3 (The Vertical Element): To directly combat the “empty sky” effect, we commissioned a monumental, fre-standing sculptural room divider in bronze and stained oak. It stood 9 feet tall but was open in design, providing a visual anchor without blocking light or views.
The Unifying Plane: A custom, oversized (14’x20′) area rug in a textured neutral bound all the seating elements together into one cohesive “island” on the vast limestone floor.
The Outcome & Metric: Post-installation analysis and client feedback revealed a 30% improvement in perceived functional space (more usable zones) and a marked increase in daily use of the room. The client reported, “It went from being a museum atrium to the heart of our home.” The key was using custom furniture not as isolated objects, but as architectural tools to define space within a space.
Actionable Advice for Your Project
⚙️ The Process:
1. Start with a “Furniture Plan,” not a shopping list. Work with a designer or create your own scaled drawing. This is non-negotiable.
2. Invest in one true anchor piece. Let this be your most significant custom item—a bed, a dining table, a sectional. Build the room out from this cornerstone.
3. Embrace negative space. In large homes, the empty areas are as important as the filled ones. Custom furniture allows you to sculpt that emptiness intentionally.
💡 The Tips:
Beware of “Square Cube” Syndrome: As furniture dimensions increase linearly, its visual volume increases exponentially. Ask your craftsman to use techniques like tapered legs, recessed bases, and streamlined profiles to lighten the visual weight of large pieces.
Material Matters: Large, flat surfaces of high-gloss lacquer or solid dark wood can feel heavy. Consider book-matched veneers, integral textures, or strategic metal framing to break up mass.
The Power of the Plinth: For casegoods in large spaces, consider designing them on a integrated base (plinth). This grounds the piece and creates a shadow line that defines its presence on the floor, much like a building on its foundation.
Ultimately, custom furniture for a large home is an exercise in confident specificity. It’s the difference between occupying a room and inhabiting it. By focusing on proportional harmony, functional zoning, and architectural dialogue, you can commission pieces that don’t just fit your space—they complete it, transforming overwhelming volume into curated grandeur. The most successful large homes I’ve worked in are those where the furniture feels as permanent and considered as the walls themselves.